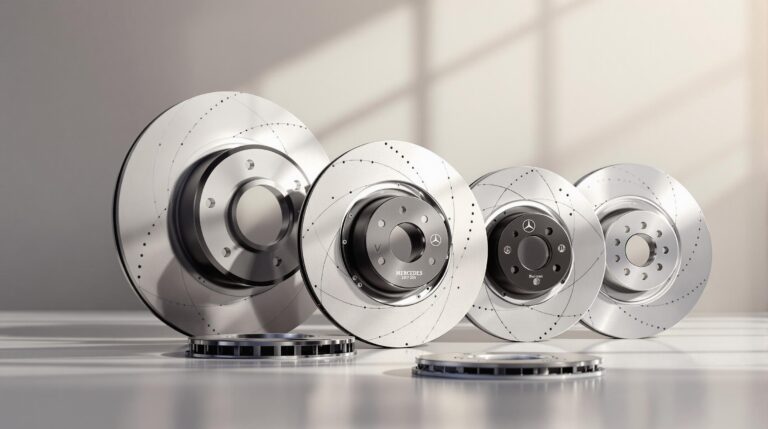
Brake Pads and Discs: Mercedes-Benz Replacement Guide
Replacing the brake pads and discs on your Mercedes-Benz is essential for safety and performance. Here’s what you need to know:
- When to Replace: Replace brake pads every 25,000–70,000 miles or when the friction material is 3–4 mm thick. Discs should be replaced if they fall below the "MIN TH" specification or show deep grooves or warping.
- Key Warning Signs: Squealing, grinding, vibrating brake pedal, longer stopping distances, or dashboard warning lights.
- Tools Needed: Socket set, torque wrench, brake cleaner, jack stands, and specialized tools like a brake caliper compressor.
- Safety Gear: Safety glasses, gloves, steel-toed boots, and wheel chocks are essential for safe handling.
- Replacement Steps: Inspect and measure components, remove worn parts, clean calipers and hubs, install new parts, and bleed the brake system to remove air.
- Break-in Process: Follow specific instructions for new pads and discs to ensure optimal performance.
Quick Tip: Regularly inspect your brakes every 10,000 miles and replace brake fluid every 2 years for better longevity and performance.
For a detailed step-by-step guide, safety tips, and tools list, continue reading.
Mercedes Rear Brake Pads, Rotors, and Sensors Installation
Checking Brake Condition
Warning Signs
Your Mercedes‑Benz provides clear indicators when there’s a problem with the brakes. These include a "Check Brake Pad Wear" message and warning sounds. Pay attention to:
- Squealing: A high-pitched noise caused by the wear indicator touching the rotor .
- Grinding: This sound signals metal-on-metal contact, meaning the brake pads are completely worn .
- Vibrating Brake Pedal: A pulsating pedal often points to warped or unevenly worn rotors .
- Reduced Performance: Longer stopping distances may indicate worn pads or low brake fluid levels .
- Warning Light: This could mean low brake fluid, worn pads, or a malfunction in the system .
If you notice any of these signs, it’s time for a closer inspection.
Physical Inspection Steps
Here’s how to perform a detailed brake inspection:
-
Initial Visual Check
Use a flashlight to examine the outer and inner brake surfaces. If the rotors appear blue or dark gold, they’ve likely overheated and need immediate attention . -
Detailed Examination
Remove the wheels for a closer look. Check for deep grooves on the rotors, uneven wear patterns, brake fluid leaks, and the condition and movement of the calipers. -
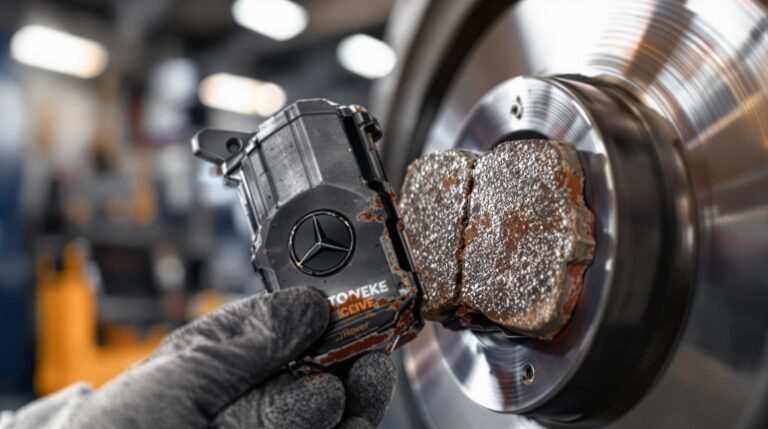
Brake Pad Assessment
Inspect the pads closely. If the friction material is almost worn down to the metal backing, it’s time for a replacement .
Measuring Brake Wear
To ensure your brakes are in good condition, measure the components and compare them to the following guidelines:
| Component | Tool Used | Replacement Threshold |
|---|---|---|
| Brake Pads | Micrometer or gauge | Less than 1/4 inch |
| Brake Discs | Digital caliper | Below "MIN TH" specification |
| Rotor Surface | Visual inspection | Visible grooves or scoring |
When measuring brake discs, take readings at 8–10 evenly spaced points across the friction surface . Compare these measurements to the rotor’s minimum thickness specification ("MIN TH") .
Conduct brake inspections every 10,000 miles to maintain safety and performance . If anything seems off, consult a qualified Mercedes‑Benz technician as soon as possible.
Getting Ready for Replacement
Tools and Parts You’ll Need
Before starting your Mercedes‑Benz brake replacement, gather the following tools and parts to make the process smooth and safe:
Basic Tools
- Socket set with extensions
- Torque wrench
- Wire brush for cleaning
- Brake cleaner spray
- Safety glasses and gloves
Specialized Equipment
- Brake caliper compressor: Lisle 29100 Quad Piston Brake Caliper Compressor ($92.99)
- Brake bleeding kit: Motive Products 0100KT Brake Bleeder Essentials Kit ($101.84)
- Brake pad gauge for wear measurement
- Brake spring pliers
Recommended Components
| Component Type | Specifications |
|---|---|
| Brake Pads | OEM or equivalent quality; replace in pairs |
| Brake Discs | Match original specifications |
| Brake Fluid | DOT 4 specification; ensure a fresh supply |
Lifting Your Vehicle Safely
Follow these steps to lift your Mercedes‑Benz securely. Safety first!
-
Preparation
- Park on a flat surface, set the parking brake, and use wheel chocks on the opposite wheels.
- Loosen, but don’t fully remove, the lug nuts before lifting the car.
-
Lifting Process
- Place the hydraulic jack under the designated lifting points.
- Insert a wood block between the jack stand and the frame rail to protect the car’s underbody.
-
Securing the Vehicle
- Position jack stands under the frame, then lower the vehicle onto the stands carefully.
Brake Locations on a Mercedes‑Benz
The brake system layout varies slightly between models, but the general setup remains consistent:
Front Brakes
- Found behind the front wheels.
- Larger than rear brakes to handle more braking force.
- Typically wear out faster due to the higher braking load.
Rear Brakes
- Located behind the rear wheels.
- Include both service and parking brake mechanisms.
- Pay extra attention when working on parking brake components.
For high-quality, OEM-standard parts, check out CarParts.com.au.
sbb-itb-395e243
Replacement Steps
Removing Old Parts
Start by disconnecting the sensor and removing fasteners in the correct order to avoid damaging sensitive components. Carefully unplug the pad wear sensor to protect it during the process. Next, remove the H5 bolt from the disc and the two H7 bolts from the caliper. Use a screwdriver to secure the disc and support the caliper with an axle stand to prevent strain on the brake lines.
For the caliper:
- Use needle-nose pliers to remove the retention clip.
- Take off the dust covers to access the two H7 bolts.
- Rest the caliper on an axle stand – never let it hang from the brake lines.
- Remove the inner pad (held by spring metal), followed by the outer pad.
For the disc removal:
- Remove the two 18mm bolts holding the disc frame.
- Apply penetrating spray to loosen the disc-hub connection.
- Rotate the disc and strike its back with a hammer to break the corrosion seal.
Once the old parts are removed, shift your attention to servicing the calipers to ensure they function smoothly.
Caliper Maintenance
"Servicing your brake calipers includes cleaning and lubricating the slide pins. We clean the pins to remove any grease or debris and inspect for rust. We then apply a heat-resistant lubricant on the pin and slide it back in, which must slide smoothly." – Weber Automotive, Inc.
Maintaining the calipers involves a thorough cleaning and inspection process:
| Maintenance Task | Method | Purpose |
|---|---|---|
| Pin Cleaning | Use a wire brush or toothbrush with brake cleaner | Remove debris and old lubricant |
| Piston Inspection | Clean with brake cleaner and test movement | Ensure smooth operation |
| Seal Check | Perform a visual inspection | Verify dust seals are intact |
| Lubrication | Apply high-temp silicone grease | Ensure smooth sliding |
After completing these steps, the caliper parts will be ready for reassembly with the new components.
Installing New Parts
Precision is key when installing the new parts. Begin by cleaning the hub surface thoroughly to ensure the new disc sits properly. Apply a thin layer of anti-seize compound to prevent future corrosion.
For brake pad installation:
- Use a C-clamp to gently compress the caliper piston.
- Install the new pads, applying copper grease to the contact points.
- Reconnect the wear sensor if your vehicle has one.
- Torque all bolts to the manufacturer’s specifications.
- Clean the hub and caliper surfaces to eliminate any leftover dust.
Once everything is reassembled, pump the brake pedal several times to seat the pads and pistons correctly. To allow the new pads to settle in, avoid harsh braking during the first 100-200 miles.
If you’re looking for high-quality brake components tailored for Mercedes-Benz models, CarParts.com.au provides a selection of OEM and aftermarket options to ensure proper fit and performance.
Final Steps and Care
Brake System Bleeding
Bleeding your brakes is essential to remove air from the system and ensure a firm pedal for effective stopping. Start with the right rear caliper, then move to the left rear, right front, and finish with the left front.
"The best strategy to follow when bleeding your brakes is to repeat the procedure several times in order to make sure that you have removed all the trapped air from the system." – Pelican Parts
Here’s how to do it:
- Fill the master cylinder with fresh, DOT-approved brake fluid.
- Use a flared nut wrench to open the bleeder valve at the right rear caliper. Continue in the same sequence (left rear, right front, left front) until you see no bubbles in the fluid.
- Close each valve and let the vehicle sit for about 10 minutes. Repeat the process if necessary.
Once the air is completely removed, you’re ready to break in your new brake components.
Break-in Instructions
After bleeding the brakes, follow the specific break-in procedure for your new components. Different brands have different guidelines:
| Brand | Break-in Procedure | Distance/Time |
|---|---|---|
| Akebono | Moderate driving, avoid heavy braking | 400-500 miles |
| Brembo Gran Turismo | 30 cycles: 60 mph to 30 mph with cooling intervals | ~1 hour |
| Hawk | 6-10 stops from 35 mph, then 2-3 hard stops from 45 mph | ~30 minutes |
Avoid the following during break-in:
- Heavy braking within the first 400 miles
- Dragging the brakes while driving
- Coming to complete stops during the process
- Using the parking brake until the system has cooled
System Check and Reset
After completing the break-in, inspect the brake fluid level and ensure everything is in order. If any warning lights remain on, reset them using a diagnostic tool. Finally, test the brakes at a low speed to confirm smooth deceleration and even pressure.
"Mercedes recommends you flush and replace your brake fluid every two years. Deposits and debris can build up in the lines over time and decrease the efficiency of your brakes." – Pelican Parts
Summary
Maintenance Schedule
It’s essential to stick to a regular brake maintenance routine to keep your vehicle performing at its best. Here’s a quick breakdown of recommended maintenance services:
- Service A: Conducted after 1 year or 10,000 miles , this includes a detailed inspection of brake components .
- Service B: Performed after 2 years or 20,000 miles , it involves both a brake component inspection and a brake fluid exchange .
These intervals work hand-in-hand with the replacement steps covered earlier.
Key maintenance reminders:
- Inspect rear brake pads every 10,000 miles .
- Replace brake pads once they reach a 2mm friction threshold .
- Rear brake pads typically last around 25,000 miles, though this depends on your driving habits .
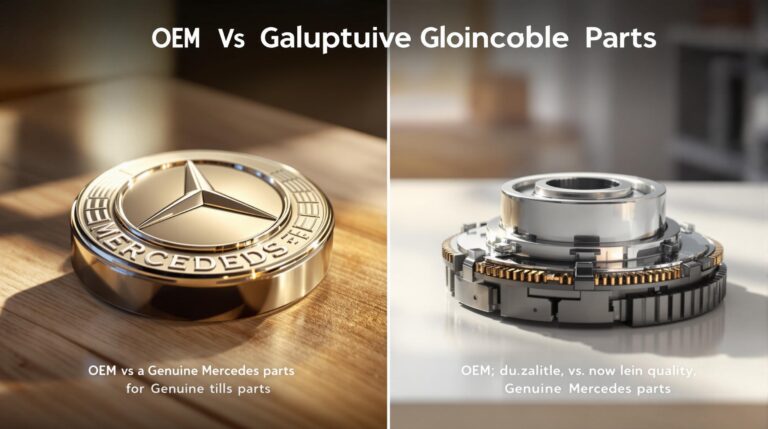
Parts Selection
Selecting the right brake components is just as important as maintenance. Here’s a comparison of options to help you decide:
| Component Type | Price Range | Typical Lifespan | Features |
|---|---|---|---|
| Genuine Mercedes-Benz | $800–1,800 | 25,000–30,000 miles | Built to factory specs, top-tier quality |
| OEM (Akebono, Brembo) | $400–800 | 20,000–25,000 miles | High quality, close to factory standards |
| Premium Aftermarket | $300–600 | 15,000–20,000 miles | Reliable and budget-friendly |
Once you’ve chosen your parts, proper care will help extend their lifespan.
Brake Care Tips
Keep your brake system in top shape with these practical tips:
- Drive smoothly and avoid hard stops whenever possible.
- Regularly check brake fluid and inspect lines, hoses, and other components.
- Address any unusual noises or changes in brake performance right away.
These habits not only enhance the life of your brakes but also reinforce the safety measures discussed earlier.